Working in text editor Microsoft Word , you probably had to create several documents in one file so that each of them had its own, separate from the other parts of the formatting. There are sections for this in Word. Having learned how to work with them correctly, you will be able to draw up more complex documentation, reports, articles and, in general, use the program in a more professional way. In this article we will look at how to remove sections in Word, and also talk about how to work with them in general. Let's figure it out. Go!
In some cases, you need to divide the text into separate parts with different formatting.
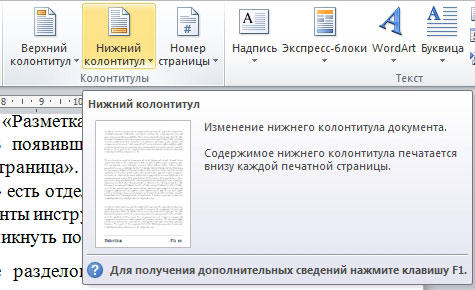
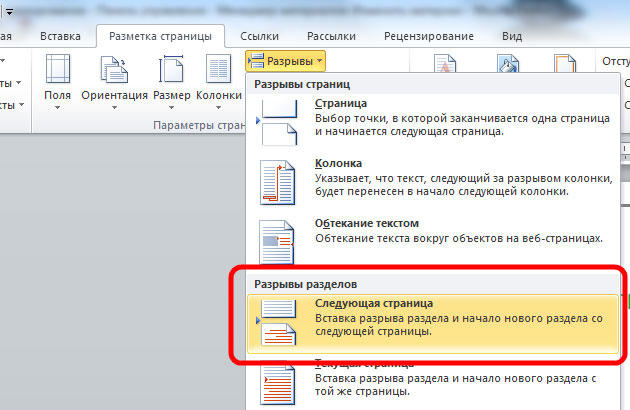
Before we proceed to delete, consider the process of adding. First you need to open the footer window. This is done by double clicking on the top or bottom of the sheet, or go to the "Insert" tab and in the "Footers" box, click " footer , Then select "Edit." Now place the cursor at the end of the sheet, after which the gap will be added. Open the Page Layout tab. In the "Page Setup" block, click "Breaks". In the list that appears, in the "Section Breaks" group, select "Next Page". Everything. Is done. AT latest versions Microsoft Word in the "Insert" tab has a separate "Page Break" button, which is located at the very beginning of the toolbar. In this case, it is enough to put the cursor at the end of the sheet and click on this button.
Please note that the deletion of sections should be carried out strictly in a certain order. Otherwise, you risk spoiling the entire text file. Before you start deleting, you need to adjust the page orientation of one document just as in the second. Similarly, you should do with footers. To do this, go to edit mode and click on the "Like in the previous section" button. This button will appear on the “Designer” tab in the “Transitions” block. The action algorithm is as follows:
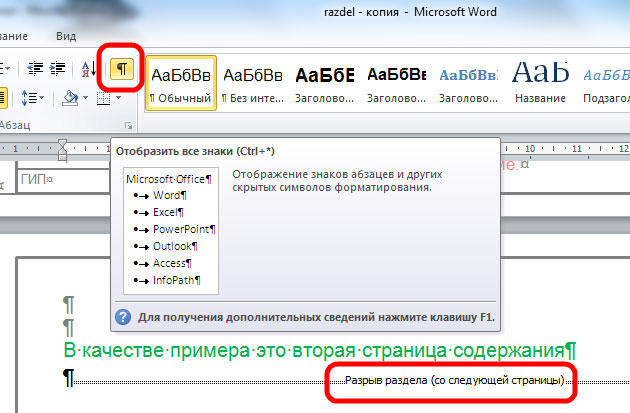
- Enable display of all characters. In the toolbar, in the “Paragraph” block there is a special button. After pressing it, all paragraphs, spaces, etc. will be marked;
- In your document, look for the string "Section Break";
- Delete this line.
If you work with a large document in a text editor MS Word, then it is more convenient to divide it into several parts, so that you can format each one regardless of the others. And in this article, we will look at how you can insert section breaks in Word into the necessary part of the document. I’ll show it in Word 2010, if you have 2007 Word installed, then all the screenshots will do, but for the 2013 and 2016 Vord one screenshot will be different.
They are inserted in order to divide the document into several parts independent of each other. After that, you can apply the necessary to each separated fragment.
For a section, you can change the page orientation, add headers and footers, number lines or sheets, add columns, or change the document borders. The changes will be applied only to the selected part and will not affect the rest of the document.
If you need or, then you can read the articles by clicking on the links.
Before you begin, enable the display of non-printable characters. Thanks to them, you can see exactly where the gap is in the document. On the Home tab in the Paragraph group, click on the "Display all signs" button.
After that, the document will display all spaced spaces, indents, line terminations, and so on. If it is unusual for you to work with unprintable characters, then after dividing the document into parts, you can turn them off by clicking the "Display all signs" button again.
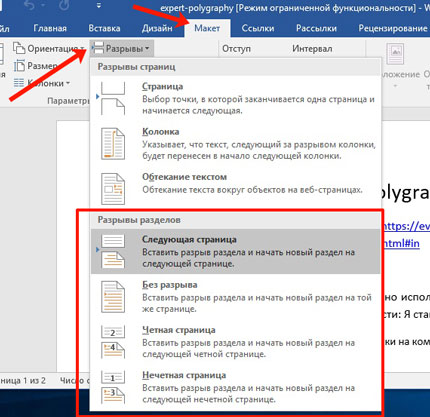
Next, place the cursor at the end of the paragraph where you want to break the text, go to the “Page break” tab and in the “Page settings” group, click on the “Breaks” button. A dropdown list will open. In it, select the appropriate item from the section "Section breaks".
This list also has. Follow the link to read more about what it is.
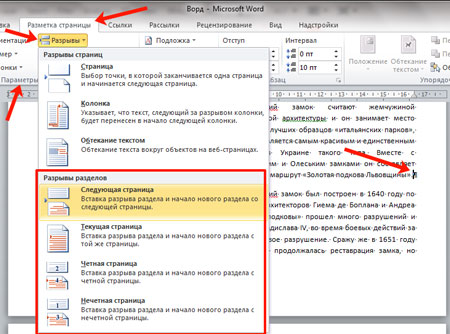
If you have installed the Word 2013 or 2016, then open the “Layout” tab, and then click on the same items that are listed above.
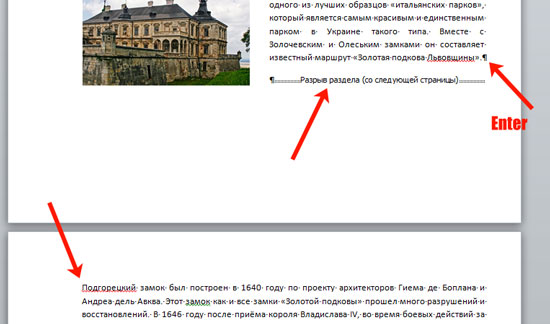
After that, the text will be divided. In the previous step, I chose the “Next Page” item, so my text of the second paragraph was moved to new sheet . If you put the cursor at the end of the text of the first paragraph and press "Enter", then in the new line you can see that the text is divided in this place.
If you select "Current page", then the text will be divided into parts accordingly.
For example, we divide in this way the two paragraphs in the example. I put the cursor after the first paragraph and select “Breaks” - “Current page”.
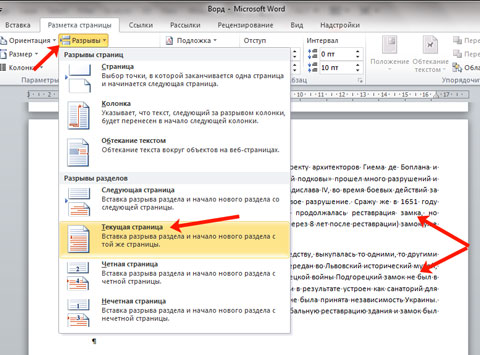
The text will be divided on the same sheet. To remove the extra line in the second paragraph, put the cursor on this line and click "Delete".
This type is used most often in the event that it is necessary to break a part of the text in a document into columns. Put it above and below the desired paragraph, and then do it. Details about this can be found in the article on the link.
There are two more types in the list: “Even page” and “Odd”. In the first case, it will begin on the next even page, in the second - on the odd one.

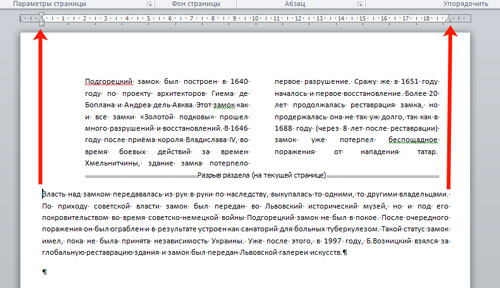
In addition to columns, for sections you can individually select the desired indents on the right and left - that is, adjust the fields. At the same time indents in other sections will not be affected.
In the example, I changed the fields for the second paragraph, and the fields in the first paragraph, which is divided into columns, remained intact.
It is much easier to work with partitioned text in a Word document. You can make a different look for headers and footers, add columns, apply a separate formatting style and so on to any piece of text.
views